Build your own secure home network and share with all computers in your home your favorite files, music, photos and video. CLICK HERE for Step-By-Step Tutorial for Home Network Automation and Network Setup.
We have reached an era that a home has more than one computer. Now the PC has its “little brother” which is none other than the laptop and there are many people who use a second PC. This guide will show you in simple steps how to build your own home network so you can give internet access for all computers but also to share files and data between them.
Step 1: “Materials needed”
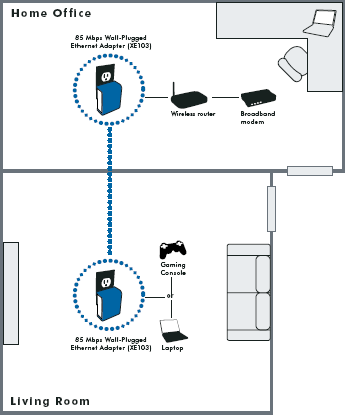
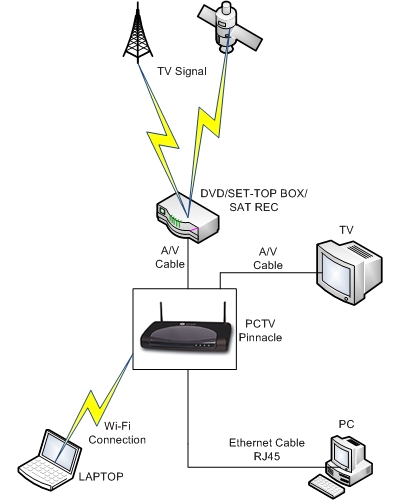
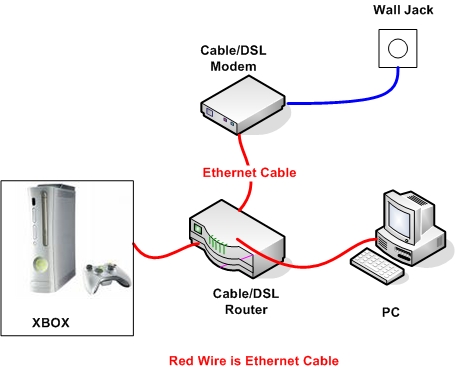
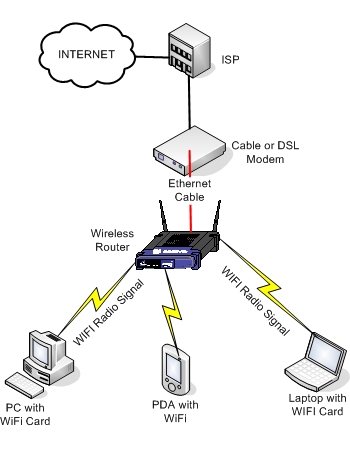
The most basic component in a network is the router. This is the device which will be sharing internet access for all computers, and it has also the “primary responsibility” to connect them together and make possible the sharing of files between them. Regarding the kind of router to buy, now the choice of a wireless device is almost mandatory, since computers can be located far away from each other in the house, and if there is a laptop, this may not have a fixed location. The price for a wireless router depends on its quality but also on other characteristics such as the wireless coverage range. Prices start from $50 and can reach up to $200 and there are highly professional solutions for over $1000.
The second component needed in a home network is called a “network card”. Usually, in modern computers it is not necessary to buy a network card since their motherboards have built-in wireless network cards that make it possible to interface at no additional charge. However, older (and economical) systems do not have these cards embedded with the result that you need to buy one. These cards are making it possible for wireless communications between computer and router.
Step 2: Connectivity
After you got everything you need and you have correctly installed the router and network cards, all that remains is to connect them together. For starters, you should go to router settings and find the option that enables the wireless network (WLAN which means Wireless LAN). These settings have to be configured on the router from a “central” computer, which should be connected to the router with a cable instead of wirelessly. Depending on the router you buy, this option may be in a different place, but will always have the same name, ie WLAN. After you switch on the WLAN, you should make sure the network cards of the other computers are turned on.
If all goes smoothly, then all computers will have to “find” your connection to the router and automatically connect to it. If this does not happen then make sure you have activated the wireless network to other computers, especially if you have a laptop, since in these there is usually a small button that activates or deactivates the wireless. Also, many firewalls will not allow the connection and it would be best-at least for a start-to disable it to see if all goes well.
Step 3: Security
If you connect all your computers successfully, there is a significant factor that should receive serious consideration. This is the security of your network. You see, your wireless router does not distinguish your own computers from the rest in the building (or even the neighborhood …!) And they may all use your own network and “steal” bandwidth. To avoid this you should get into the router settings and find the option «encryption» (usually located in the tab WLAN). There select the «WPA-PSK» or «WPA2» and immediately you will be asked a password. After entering your password, then automatically the other computers you will be asked the same keyword that you must enter to gain access to your network.
Step 4: File Sharing
Now logically all computers must have internet access and all that remains is for you to share the files you want. To do this, all you have to do is go to the folder you want to give access to all your computers and right-click with the mouse. Select “Properties” and the window that appears select the tab “sharing”. Now all you have to do is check the box that says “share the folder on the network” (the middle option). That’s it! You can do the same for your entire hard disk with the same procedure.
For Detailed information about setting up a home network CLICK HERE.
